

"Led's on a Budget"
Low Cost Tinted Side Marker and LED Install
If
you have ever been to a car show that extended into the evening hours
you may have noticed the eye catching after market illumination of LED
lighting. Light Emitting Diodes have made a very big splash in the
automotive world. These technological wonders offer price effective,
low energy, multi-colored bright light. LED's last virtually forever
and their use is limited only by your imagination.
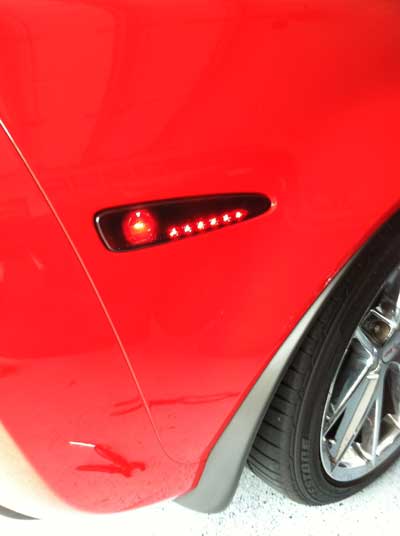
A very nice
place to use LED's are on the side marker lights on your Corvette.
After market LED side markers are very expensive. A low cost solution
is to make your own utilizing your existing side markers. The only
expense in this budget install are the LED's. The
best, and
cheapest LED's can be found in the auto accessory isle in any of the
Mart stores. The LED's come in pre wired strips with 3M automotive
grade tape backing. The LED's can be had in six to twelve inch lengths.
The come packaged two strips to a box. We used the red six inch LED's.
They run about thirteen dollars for a set of two LED strips.
Remove
the LED's from the packaging and cut the excess wiring leaving about a
12 inch length of wire for each strip. Go to the car and
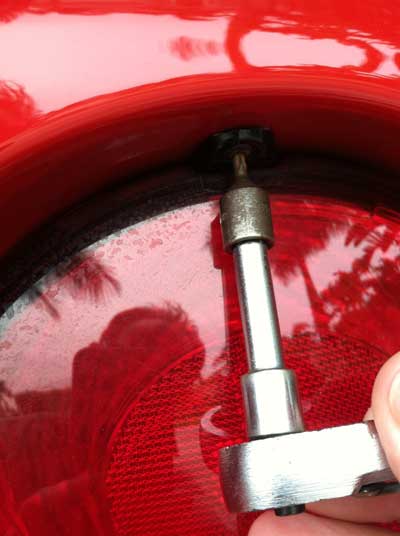
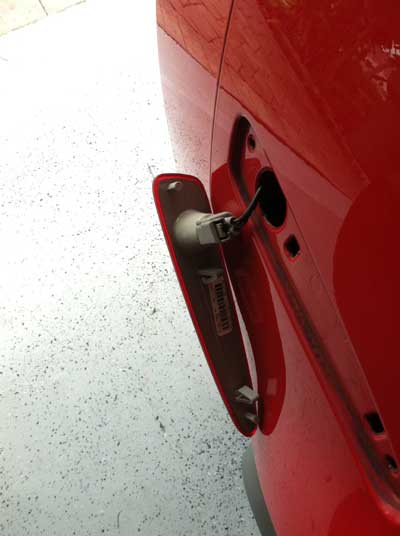
remove
the top screw from each outward rear brake light using a T-15 torx
socket. Remove the rear passenger and driver side lights.
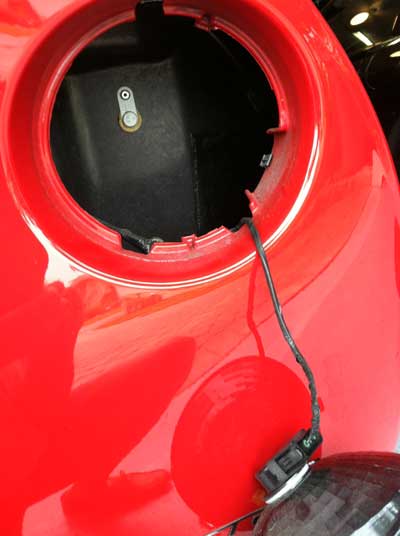
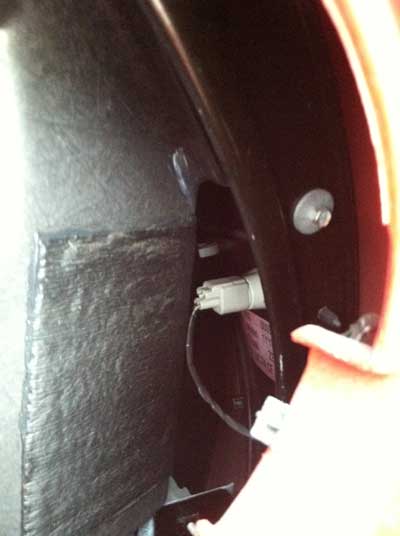
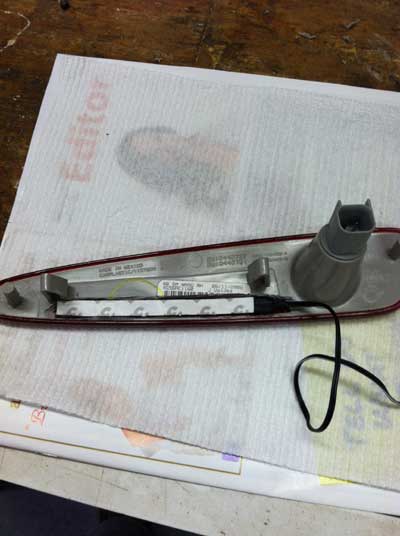
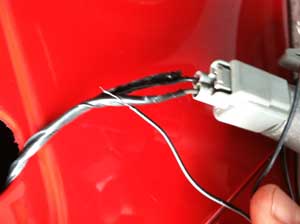
Reach into the rear fender
cavity and feel for the side marker light retainer tabs. Squeeze the
tab that is shaped like a triangle and push outward at the same time.
The side marker will pop out after a little pushing and twisting. Pull
out the weather pack connector that powers the rear marker. Tape the
power lead to the rear panel to prevent it from falling into the wheel
well cavity.
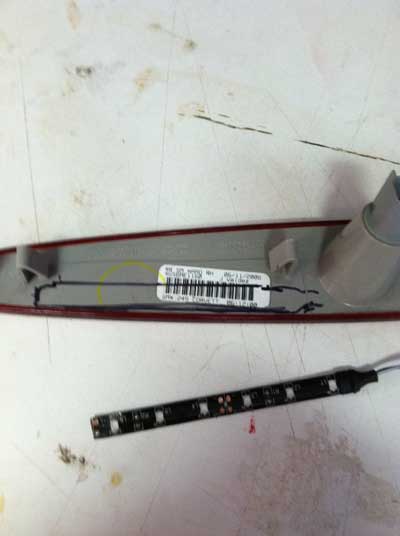
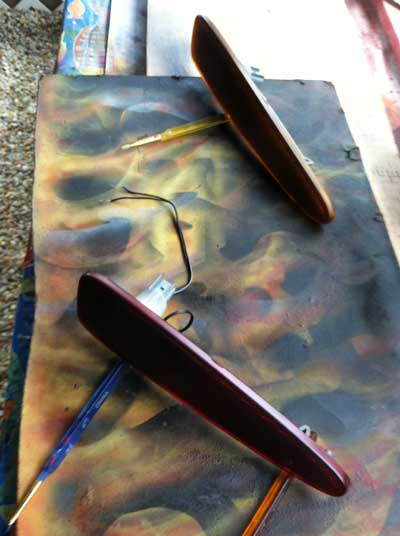
Place the marker on a clean
surface. Using the LED as a template trace the outline of the LED strip
on the back of the marker assembly. A fine tip black Sharpie works well
for the tracing the outline.

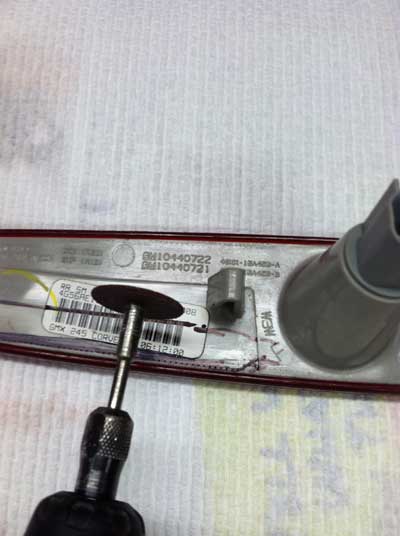
Using
a Dremel tool and a fine cutting wheel carefully cut out the outline on
the marker. Do this very slowly and make sure you only cut
into
the back of the marker about a sixteenth of and inch. You do not want
to cut into the reflector itself, just the gray plastic backing.
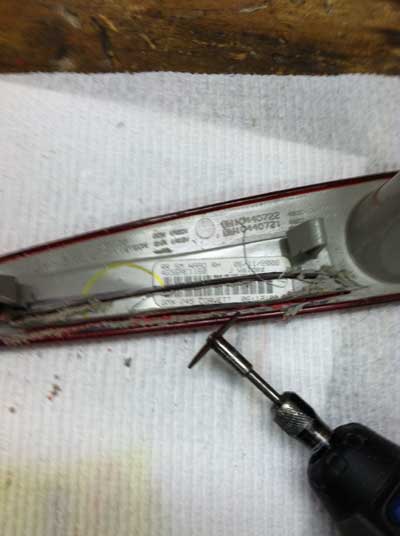
Remove
the cut backing material and sand off any excess plastic. Place the LED
strip into the new opening and check or a tight fit. You may have to
remove more material to get the LED strip to seat into the opening.
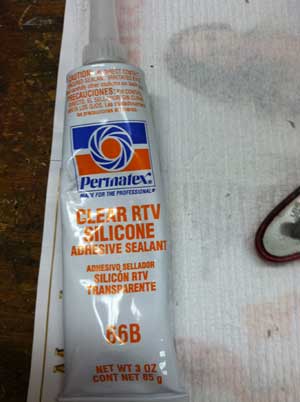
Seal
the led strip into the marker using some clear RTV sealant. Let the
assembly dry over night. Repeat this procedure for the other rear
marker.
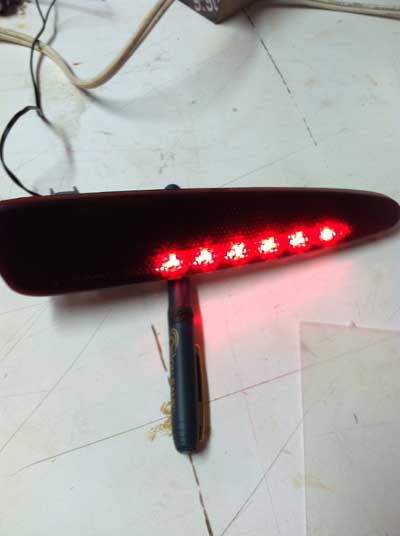
After the sealant had dried test the LED by energizing
the lead wires. The wire with the white stripe is positive. You can use
any 12v source, the LED's come with a 12v battery pack and small switch
that can be used to test the lights.
A
very cool mod is to black out the side markers. The best product for
this is Rust-oleum Lens Tint. This stuff costs about ten dollars a can
and is stocked by most automotive stores.
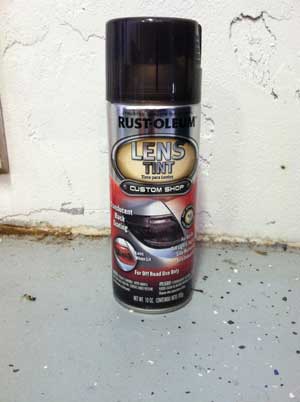
Take the side
markers to a location out of your garage to do the tinting. If you tint
the lens's in the garage the fine paint mist will find its way onto
every thing you own, including your car. The only way to get this
gritty stuff off your car is with a clay bar and a lot of elbow grease.
Pace
the markers on a flat surface. Clean the front of the markers with some
rubbing alcohol. Hold the can about 12 inches from the marker while
spraying. For a blacked out look three coats of tint will be necessary.
Let the tint dry for about an hour between coats.Do not apply more than
three coats of tint as the light may not be able to shine through.
After painting allow the tint to dry over night.

Splice
the LED wire with the white stripe into the brown marker power lead
wire, splice the black LED wire with the black marker power lead wire.
Using push in wire splicers make the job a snap. Wrap the splices with
electrical tape and pop the assemblies back into the fender. Repeat
this procedure fro the remaining marker lamps.
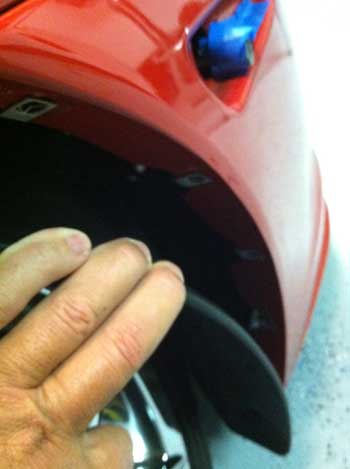
To gain access to the
front markers turn the wheels to one side and remove the screws that
secure the inner fender liner. Pull the fender liner away from the car
and reach into the front fender cavity to access the front marker
assemblies.
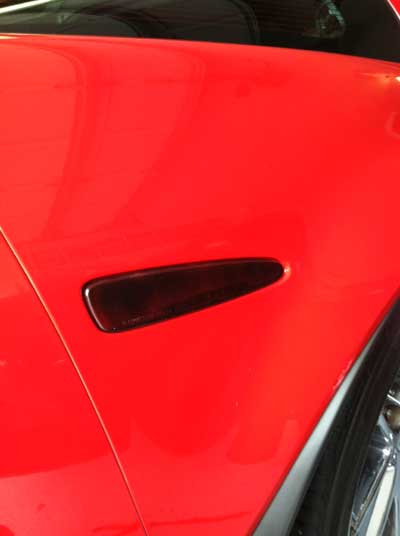
The finished product will give you the same results as the high priced
after market kits at a fraction of the cost.
The Vette Nuts