


Most
new cars come with a very handy accessory, a back up camera.
Unfortunately Corvette owners, with the exception of the C7, were not
afforded this option. The lack of rear view visibility can make
backing a C6 Corvette into a very tight parking spot a tricky
proposition. The tricky part can also be expensive if you inadvertently
back up into a spot that has a high concrete tire stop. The low hanging
rear mufflers can self destruct if you hit these things. We have seen
this happen a number of times, usually at a car show when you are
forced to back into a spot.
The
simple solution to enhanced backwards navigation is to install a backup
camera system. Those of you with the factory NAV system might wonder if
you can simply plug a camera into the back of the NAV unit with
an AV plug. Of course you can't, GM never makes anything that
simple. There are no AV inputs on that expensive GM in dash monitor.
There are two option open to C6 owners:
Option 1 - Replace the entire in dash unit with an after market AM/FM/DVD/GPS....yatta yatta yatta wiz bang unit.
Option 2 - Look on Amazon or EBay for an inexpensive camera and monitor.
Option
1 is great if you are willing to shell out some big bucks for a new
stereo system. A very nice replacement for the C6 is the Pioneer
AVIC-8000NEX In-Dash Navigation AV Receiver with 6.1-inch WGA
Touchscreen Display.
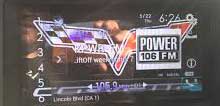
This
unit has all the bells and whistles. This type of system is what GM
should have put in the car in the first place. Talk to any C6 owner
with the NAV factory NAV option and the universal response is "it's a
real POS". If your car does not have factory NAV this is a perfect
upgrade. The unit retails for about $700, add installation and you
still have a great system that costs less than $1k.
With
the Pioneer system all you have to do is buy a cheap rear backup
camera, mount it to the rear, hook it up to the rear backup lights and
run the wire up to the back of the monitor and plug it in. If you don't
want to run wires you can even transmit the picture with a cheap
wireless adapter.
Option
2 is great if you want to keep the crappy factory NAV system. The
installation of a stand alone backup system can be done by anyone with
even the most rudimentary knowledge of automobile electronics. We found
a very highly rated and very low priced camera and monitor on
Amazon.
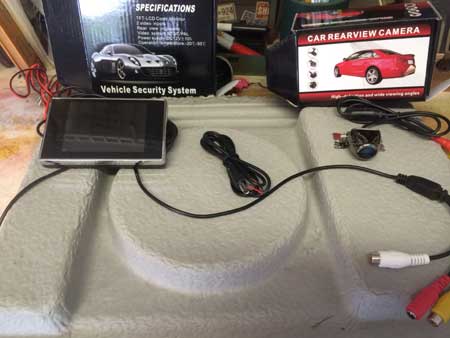
The
camera is the Lot Fancy waterproof rear vehicle backup camera with a 135
degree viewing angle. The camera is chrome plated and is mounted on a
small metal base. This was perfect for the rear mounting location on
the C6.

The
monitor as purchased from the same company, Lot Fancy. It has a
3.5 inch screen and is about 1/2 inch in width. Again perfect, a big
monitor would not fit the look of the C6. The best part of these units
are the price. The monitor costs $19.90 and the camera costs $11.80.
Total cost for the system was $31.70, how are you going to beat that,
we even got free shipping from Amazon.

The camera and monitor are built and shipped from China. The price of China's currency dropped dramatically recently and the price of their products show it. The two items we ordered were packaged very neatly and arrived within a week of ordering. The items themselves are excellent quality and work perfectly.
The
first step in the installation is hooking up the rear camera. We
mounted it above the rear license plate on left side. We did not screw
the camera into the car body.
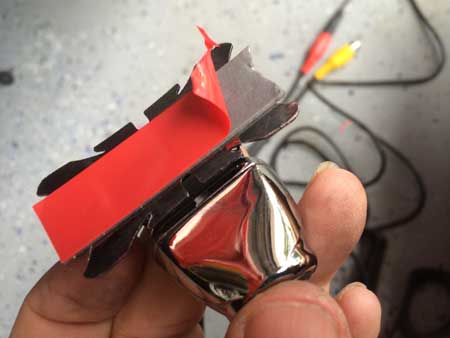
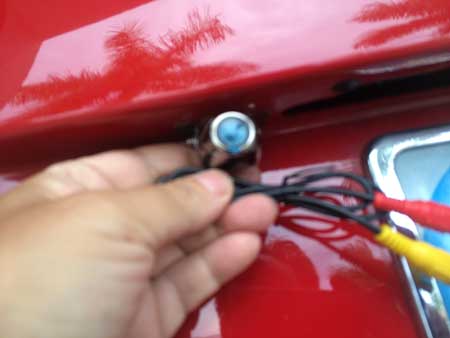
A
small piece of 3M double sided tape was used to secure the camera to
the location we selected. There is a small opening at that location
where the wires can be passed through.
You
will also need about 15 feet of heavy duty speaker cable that will be
used to power the monitor from the same source (the rear back up
lights).


unscrew the 4 screws that hold up the rear valance reach under the valance and unscrew the reverse light from its socket
The positive and negative leads to power the camera were run to the rear back up lights. The speaker wire was also run back yo the backup lights. To access the lights all you have to do is unscrew four of the 10mm screws under the rear fascia and reach inside until you feel the the bulb connector. Turn the connector and pull it down so you can splice into it.
The
rear backup light bulb is powered by two wires, The green is positive
and the brown is negative. Using a plastic wire splicer we spliced the
red camera power wire and the positive lead of the speaker wire into
the green rear backup light wire. We then spliced the black camera
ground wire and the negative speaker wire into the brown ground backup
light wire.
After
the connections are secure you can re-plug the rear back up bulb back
into its socket. We left everything hanging until we were sure that
both the camera and monitor was working.
The camera has a a yellow AV plug the has to be run to the monitor.
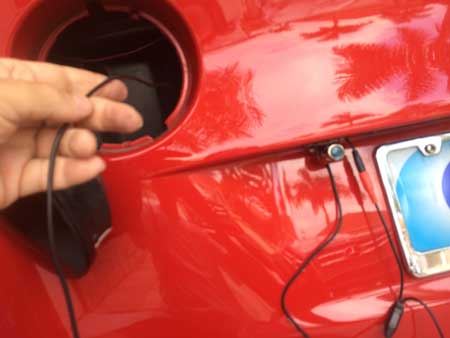
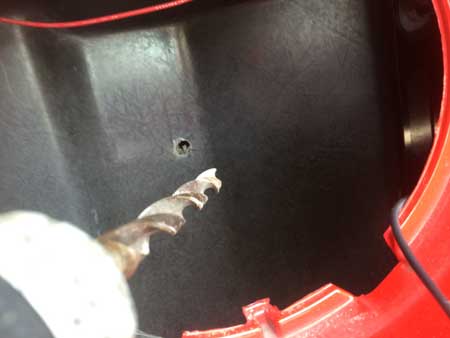
remove one rear lens drill a 1/4" hole through to the rear cabin
We removed one of the rear light assemblies and drilled a 1/4 inch hole through the rear plastic frame directly behind the light. This allowed us to pass the power and AV plug wires into the passenger cabin.
The
camera AV plug wire and the speaker power wires were run through the
hole and under the rug along the driver side of the cabin. The wires
were then snaked through the center of the rug and tucked under the
right side of the console where they exited to the center console.
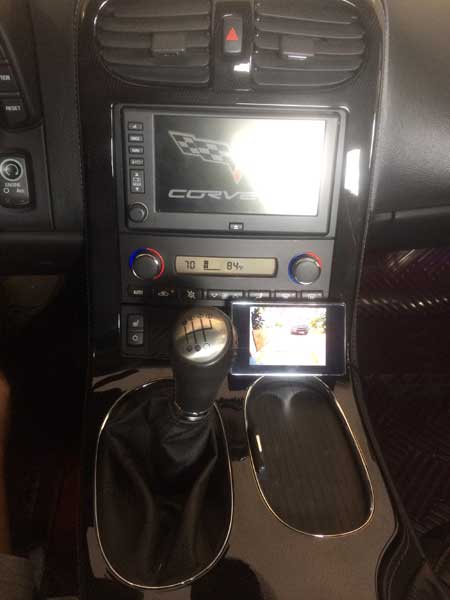

monitor
on lower right side of console
monitor in center of
console
The
monitor can be mounted on the right side or the center of the center
console using a
small piece of 3M double sided tape. The center of console
location is much easier to see, the trade off is that in this location
it hides the temperature read out. If you can find a better spot let us
know about it. The speaker wires that power the unit were spliced into
the red
and black monitor power leads and the yellow AV plug was connected to
the female monitor connector.
The
moment of truth had arrived we fired up the car and put the shifter in
reverse. Sweet success the monitor powered up and gave us a very clear
picture of what was behind the car. The monitor also has colored backup
grids, just like factory units. The yellow hash marks puts an object about three feet from the bumper.
After
we were sure everything worked we buttoned up every thing on the rear
end. The backup light was re-plugged into its receptacle and the wires
were tucked away after re screwing the four bolts that hold up the rear
fascia. A small dab of RTV sealant was placed around the cabin hole
that we passed the wires through. The rear light assembly was then put
back into place.
This is a great rainy day weekend project if you have nothing else to do. Total install time was less than two hours.
The Vette Nuts
return to index page